Set Up Develop Environment
In this section, we are going to show you how to set up your development environment for SeaTunnel, and then run a simple example in your JetBrains IntelliJ IDEA.
You can develop or test SeaTunnel code in any development environment that you like, but here we use JetBrains IDEA as an example to teach you to step by step environment.
Prepare
Before we start talking about how to set up the environment, we need to do some preparation work. Make sure you already have installed the following software:
- Git installed.
- Java ( JDK8/JDK11 are supported by now) installed and
JAVA_HOMEset. - Scala (only scala 2.11.12 supported by now) installed.
- JetBrains IDEA installed.
Set Up
Clone the Source Code
First of all, you need to clone the SeaTunnel source code from GitHub.
git clone git@github.com:apache/incubator-seatunnel.git
Install Subproject Locally
After cloning the source code, you should run the ./mvnw command to install the subproject to the maven local repository.
Otherwise, your code could not start in JetBrains IntelliJ IDEA correctly.
./mvnw install -Dmaven.test.skip
Building seaTunnel from source
After you install the maven, you can use the follow command to compile and package.
mvn clean package -pl seatunnel-dist -am -Dmaven.test.skip=true
Building sub module
If you want to build submodules separately,you can use the follow command to compile and package.
# This is an example of building the redis connector separately

 mvn clean package -pl seatunnel-connectors-v2/connector-redis -am -DskipTests -T 1C
Install JetBrains IDEA Scala Plugin
Now, you can open your JetBrains IntelliJ IDEA and explore the source code, but allow building Scala code in IDEA, you should also install JetBrains IntelliJ IDEA's Scala plugin. See install plugins for IDEA if you want to.
Install JetBrains IDEA Lombok Plugin
Before running the following example, you should also install JetBrains IntelliJ IDEA's Lombok plugin. See install plugins for IDEA if you want to.
Install JetBrains IDEA CheckStyle-IDEA Plugin
Before coding, you should also install JetBrains IntelliJ IDEA's CheckStyle-IDEA plugin.
See install plugins for IDEA if you want to.
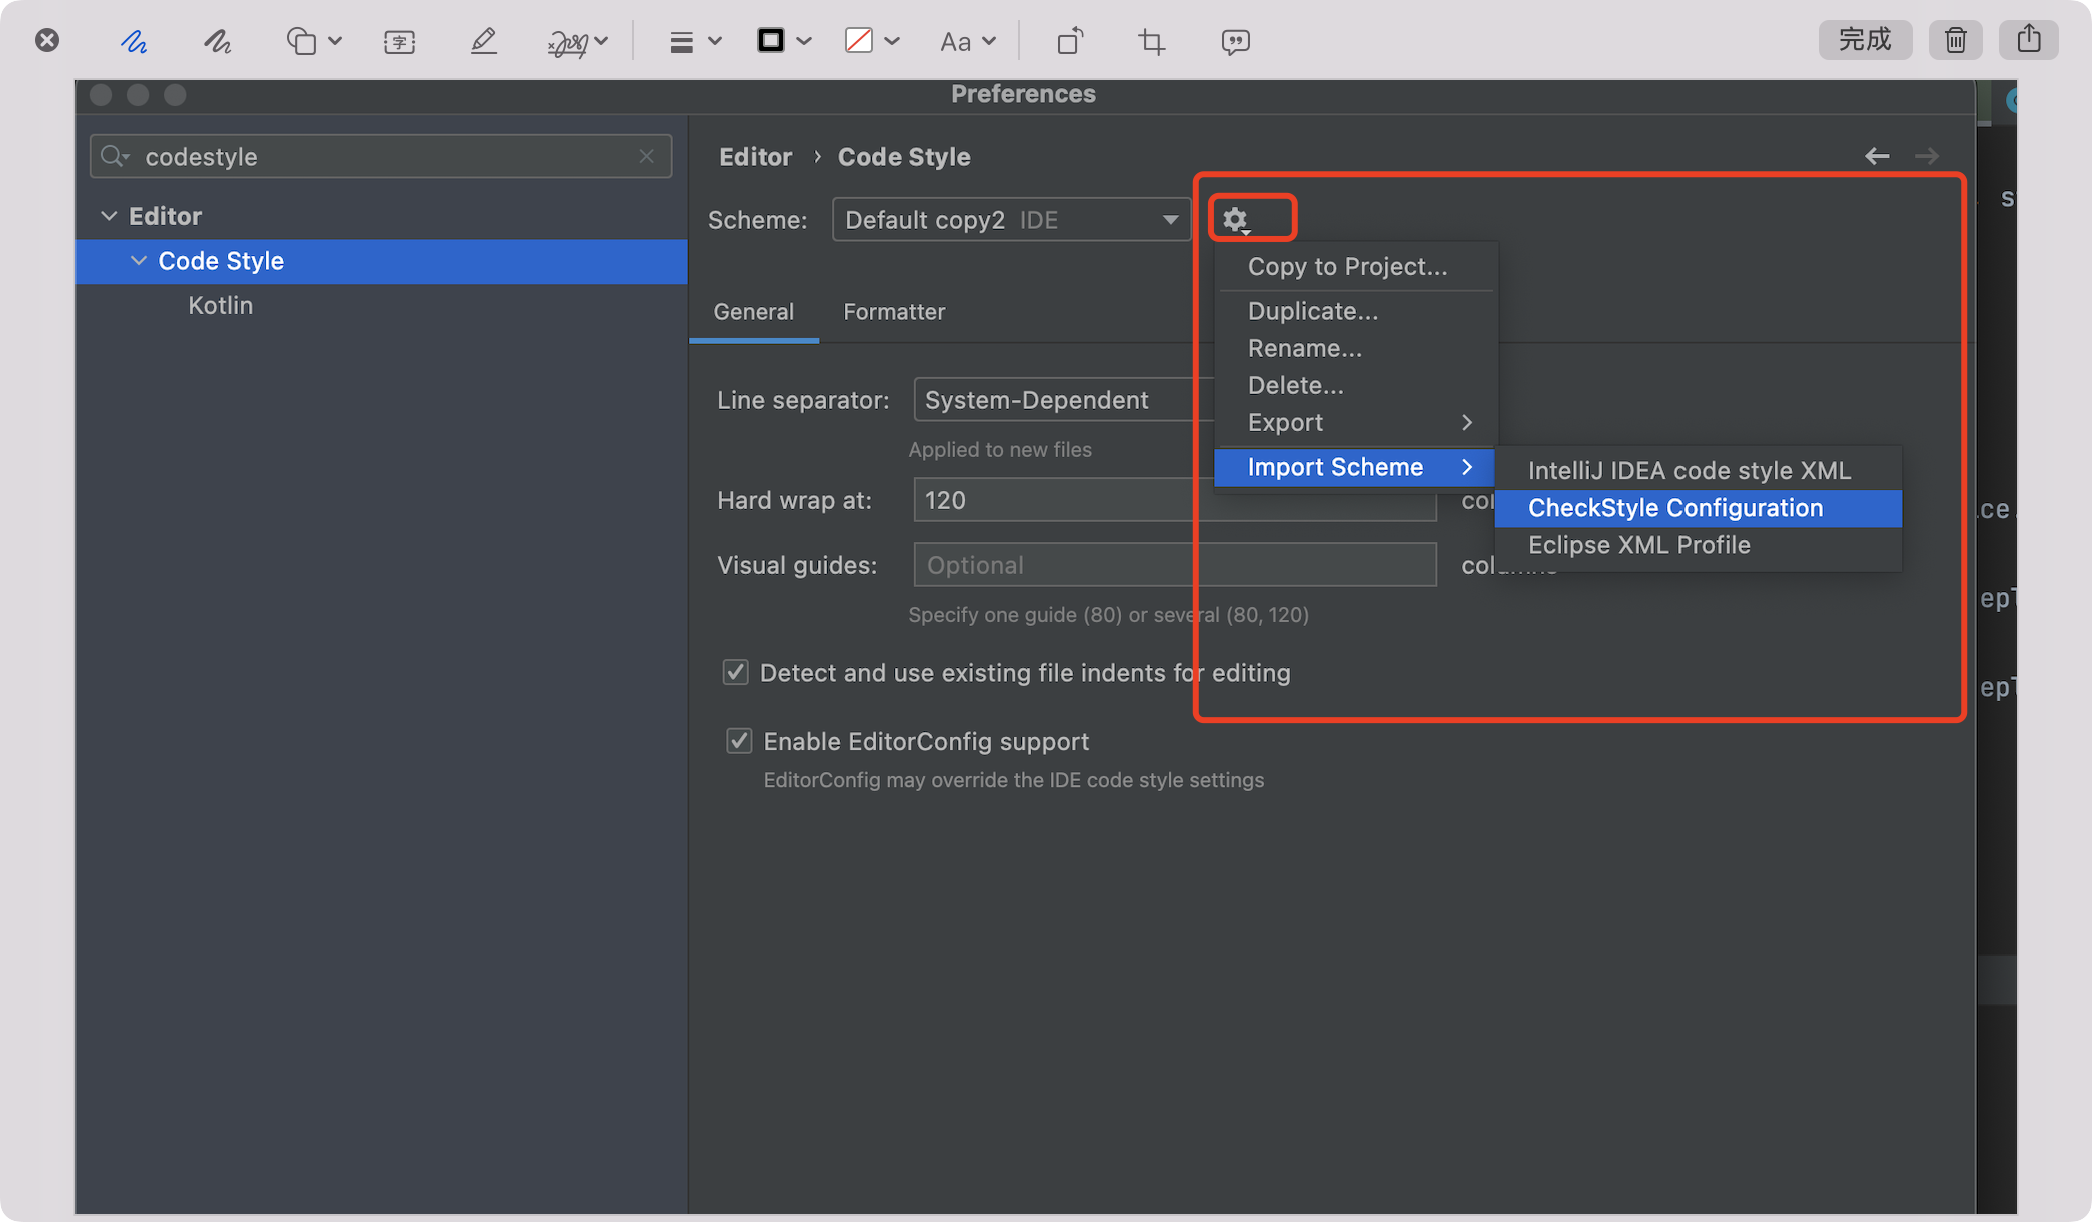
Next, you should go to Preferences -> Editor -> Code style -> Scheme -> Import Scheme -> CheckStyle Configration and import tools/checkstyle/checkStyle.xml
 If you want to change to automatically formatting, these configurations are also required.
Run Simple Example
After all the above things are done, you just finish the environment setup and can run an example we provide to you out
of box. All examples are in module seatunnel-examples, you could pick one you are interested in, running or debugging
it in IDEA as you wish.
Here we use seatunnel-examples/seatunnel-flink-examples/src/main/java/org/apache/seatunnel/example/flink/LocalFlinkExample.java
as an example, when you run it successfully you could see the output as below:
+I[Ricky Huo, 71]
+I[Gary, 12]
+I[Ricky Huo, 93]
...
...
+I[Ricky Huo, 83]
What's More
All our examples use simple source and sink to make it less dependent and easy to run. You can change the example configuration
in resources/examples. You could change your configuration as below, if you want to use PostgreSQL as the source and
sink to console.
env {
  execution.parallelism = 1
}

source {
  JdbcSource {
    driver = org.postgresql.Driver
    url = "jdbc:postgresql://host:port/database"
    username = postgres
    query = "select * from test"
  }
}

sink {
  ConsoleSink {}
}